TIPS FOR DESIGNING YOUR NEXT PUNCH NEEDLE PROJECT
For my friends who have been with me for a hot second on my creative journey, you know that punch needle is my latest, greatest obsession.
And for those who I’m just meeting-- Hi! I’m Katie and I’m in love with punch needle and tufting techniques…
One inquiry I get most often when teaching my punch needle workshops is how do I go about making a design for my next project.
I mostly work in the abstract and find that I work best just doodling shapes and going with the flow.
But I know that not everyone is like me and needs more of a game plan going into a new project.
So this one’s for you, my planners! Here are 4 tips for designing your next amazing punch needle project.

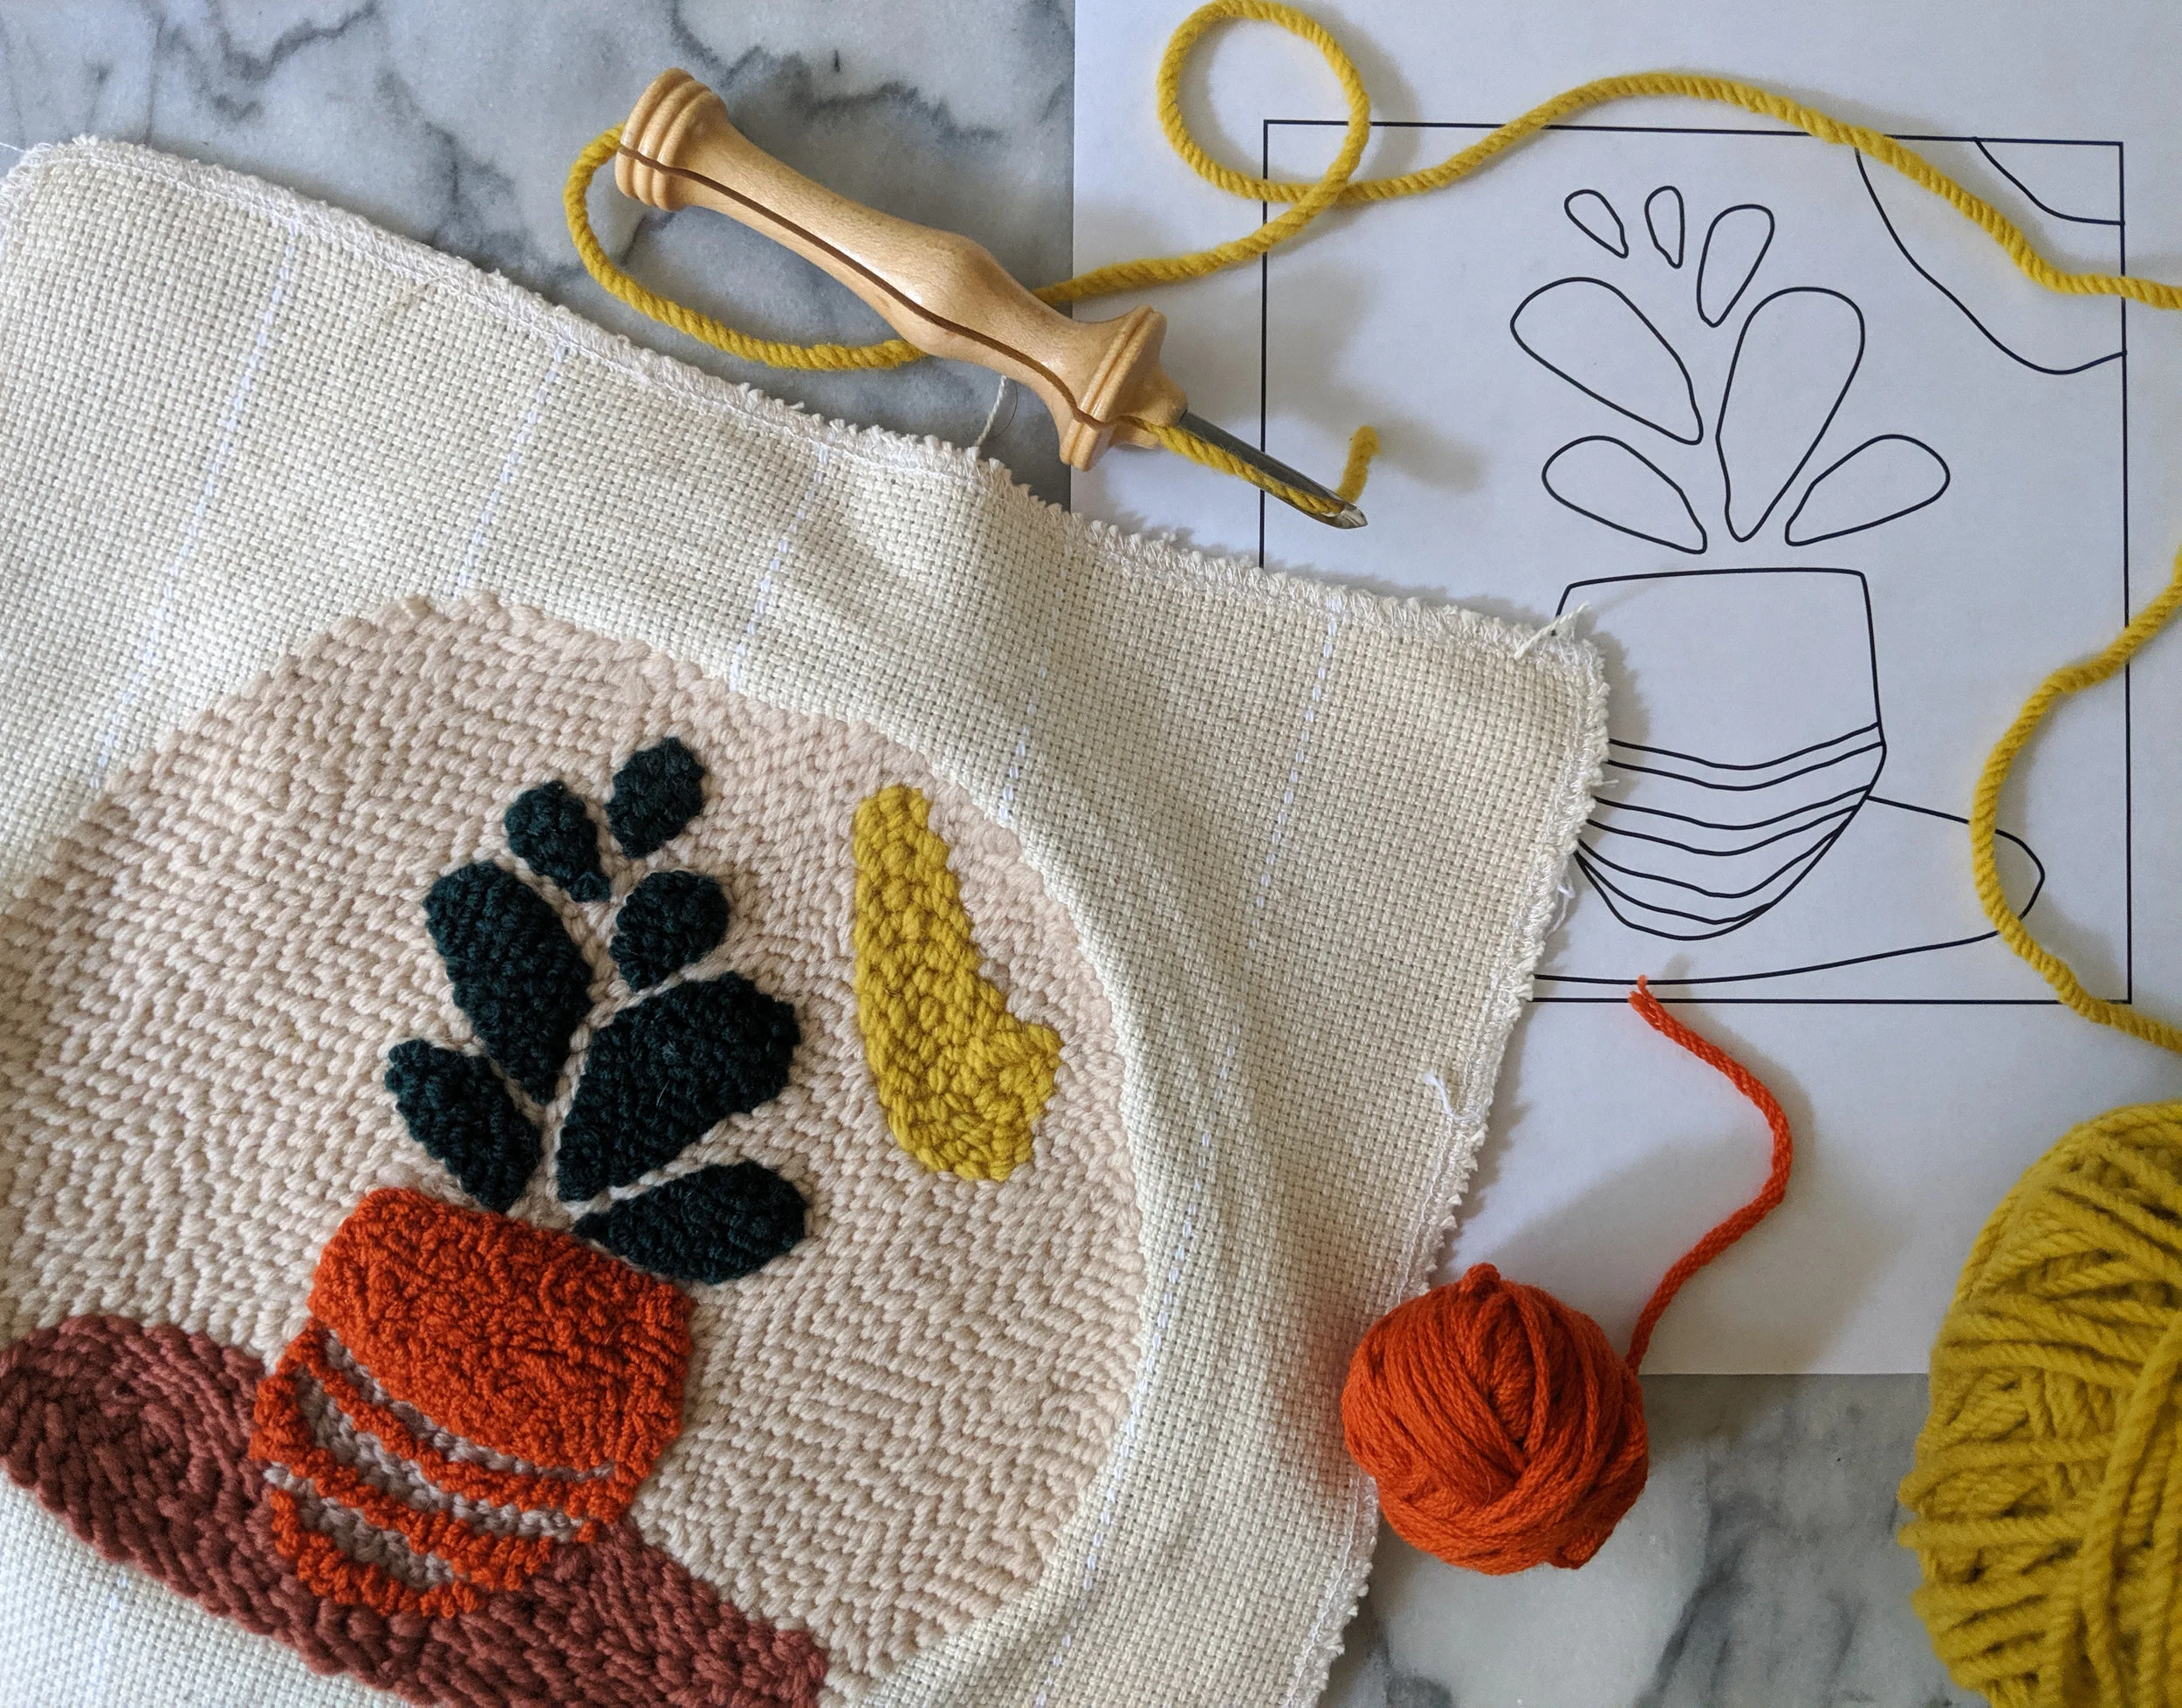
Start with large, simple shapes. Use your color and texture choice to bring the impact and detail!
Less is More
When brainstorming your next design to translate into punch needle texture, less is always more. Yarns that are punched into fabric have a tendency to bloom and spread (what the heck is blooming?? Don’t worry-- I’ll go over this in our next tip!). This means that designs that have lots of fine line detail can get lost in translation and won’t show up in the way you may have imagined in your mind’s eye. A go-to resource I tell my students is to look at coloring book designs. Coloring book designs are usually made up of large, uncomplicated shapes. They may look simple, but don’t be fooled. It’s the coloring that counts, right?! My suggestion is to choose simpler shapes and then fill them with all the color you want! Don’t be afraid to make your shapes larger in scale as well.
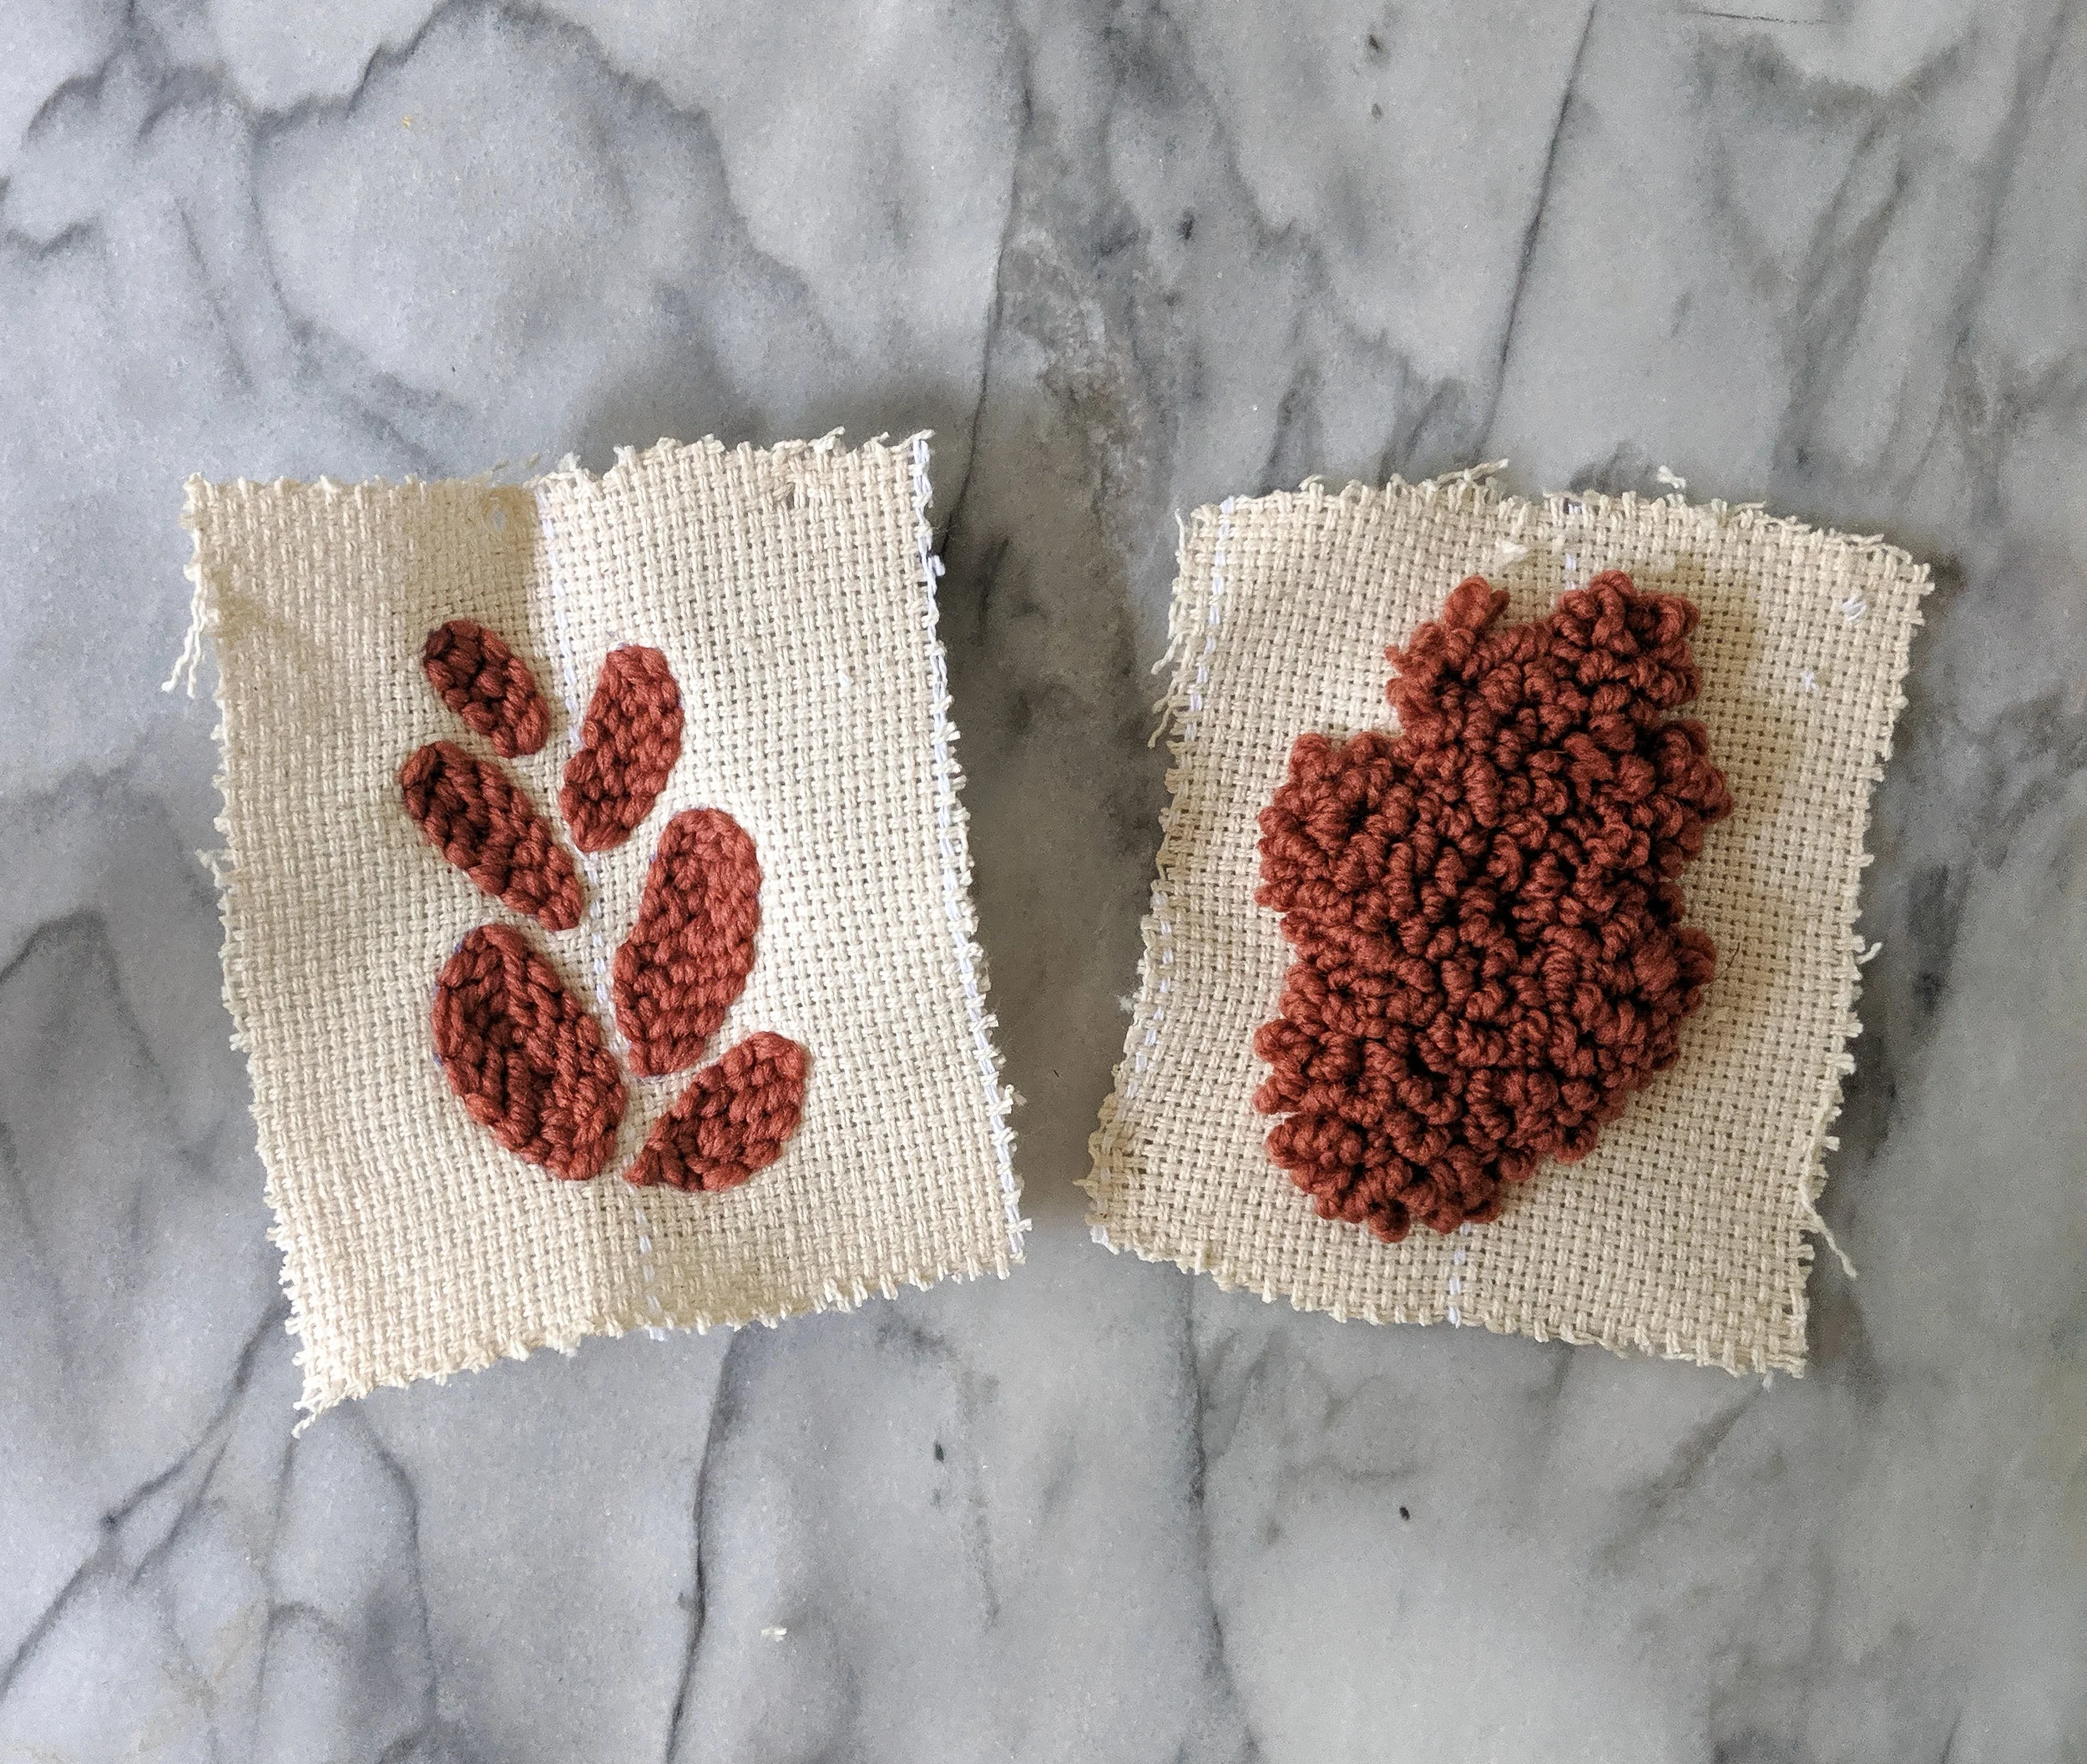
These two samples are the same design. The flat stitch side looks nice and crisp, but the pile side is blooming blob.
Give Yourself Space
This tip goes back to my note about yarn blooming. Blooming is a term that refers to a yarn’s tendency to spread out when it is in its final state. This is a word you hear a lot in knitting, but also has a place in punch needle and tufting. As you punch, you are forming loops with your yarn on one side of your fabric. Those loops-- called pile-- spread and fluff and take up a ton more space than expected. This is what I mean by “blooming”. When you’re putting your design elements together, make sure to give yourself space between your shapes. This becomes super important in botanical or floral designs. Closely packed leaves may look awesome from your flat side, but become a huge loop blob on your pile side.
Pick a Side (or Don’t!): Flat Side vs. Pile Side
One of the reasons I love punch needle is the various textures you can make at such an efficient pace. This variety of textures can come from making your piece dual sided. Some folks only love the flat stitch look, some only love the textured pile look. I’m not usually one to pick sides-- I want the best of both worlds! I tend to draft designs that incorporate both flat stitches and loop pile to give diversity in my punching. When designing, think ahead to the texture you are wanting to accomplish. Flat stitches can allow for more fine line detail while loop pile lends itself well to chunky texture. Mixing them together can help to bring dramatic depth and push certain design elements to the forefront of your work.

I wanted the pot and leaves of my potted plant to pop, so I made sure those elements were created with loop pile and surrounded the potted plant with flat stitches to really push those elements forward. You can start to see the difference in depth between my orange pot and the neutral stripes on the pot.

I wanted the word “light” to be created with a loop pile. This means that I had to trace out the word “light” on the back side of my foundation cloth backwards in order for it to be legible on the other side.
Think Backwards
If you’re wanting to punch out phrases or words of affirmation, make sure you are tracing them onto your foundation cloth in the correct orientation. As you punch, the image on your pile side is a reflection of the stitches you are making. When creating words that you want to be legible from the pile side, you’ll need to punch out these words backwards so that they are reflected properly on the other side. Take a peek at my example pics.
Alrighty, friends! Those are my top 4 tips for drafting punch needle designs.
I hope this helps you as you journey into your next project!
Need some help getting your creative juices flowing? I’ve made all of the punch needle designs pictured above into templates just for you! Enter your email address in the form on the right to download these punch needle templates! Happy making!

Download these free templates!