
HOW TO DRAFT A FACING FOR YOUR ZADIE JUMPSUIT

Don’t mind me over here in my Paper Theory Zadie Jumpsuit! I cropped the legs to shorts, made my belt twice as wide and created a facing finish for the neckline. Jumpsuit is made with Spoonflower’s Organic Sweet Pea Gauze featuring printed design “Tibetan Tigers on dark blue green” by Tasiania.
I recently completed a Zadie Jumpsuit (with a twist!) for Spoonflower’s Me-Made-May employee sew along. One of my twists was that I drafted a facing for the bodice instead of finishing it with bias binding. I thought I’d put together my notes and share them with y’all!
Don’t get me wrong, I do enjoy a good bias binding finish. But I was pretty sure creating bias binding with gauze would most likely turn into a headache for me (know thyself…). I went the facing route to ensure a clean finish and no hair-pulling or tears!
What I Used:
Zadie Jumpsuit Front Body, Back Body and Front Leg pattern pieces
Seam Gauge
Paper + pencil
This facing is attached to the bodice along the same path that the original bias binding takes from the bullet point at the Front Leg up and around the neckline and down the other side. I designed this facing to have 3 facing pieces sewn together-- 2 for the right and left sides of the front body and 1 along the back of the neck. Essentially, I was creating a really long, curvy u-shape.

This is what my facing will look like when all 3 pieces are sewn together.
Step 1: Trace the Front Body and Front Leg Together
With the Front Body laid out on your paper, trace the curved line of the center front from the top of the pattern piece all the way down to the waist line. You should have a singular, curvy line that mimics the curve of the body front.

Just trace the curvy line on the center front of the Zadie Front Body!
Once traced, take your Front Leg pattern piece and lay it on the paper making sure to overlap the Front Leg onto the traced Front Body by ⅜ inch. Overlapping is super important here! You have to account for the seam allowance at the waistline. Trace the center front line of the Front Leg from waistline to the drill hole on the pattern piece.
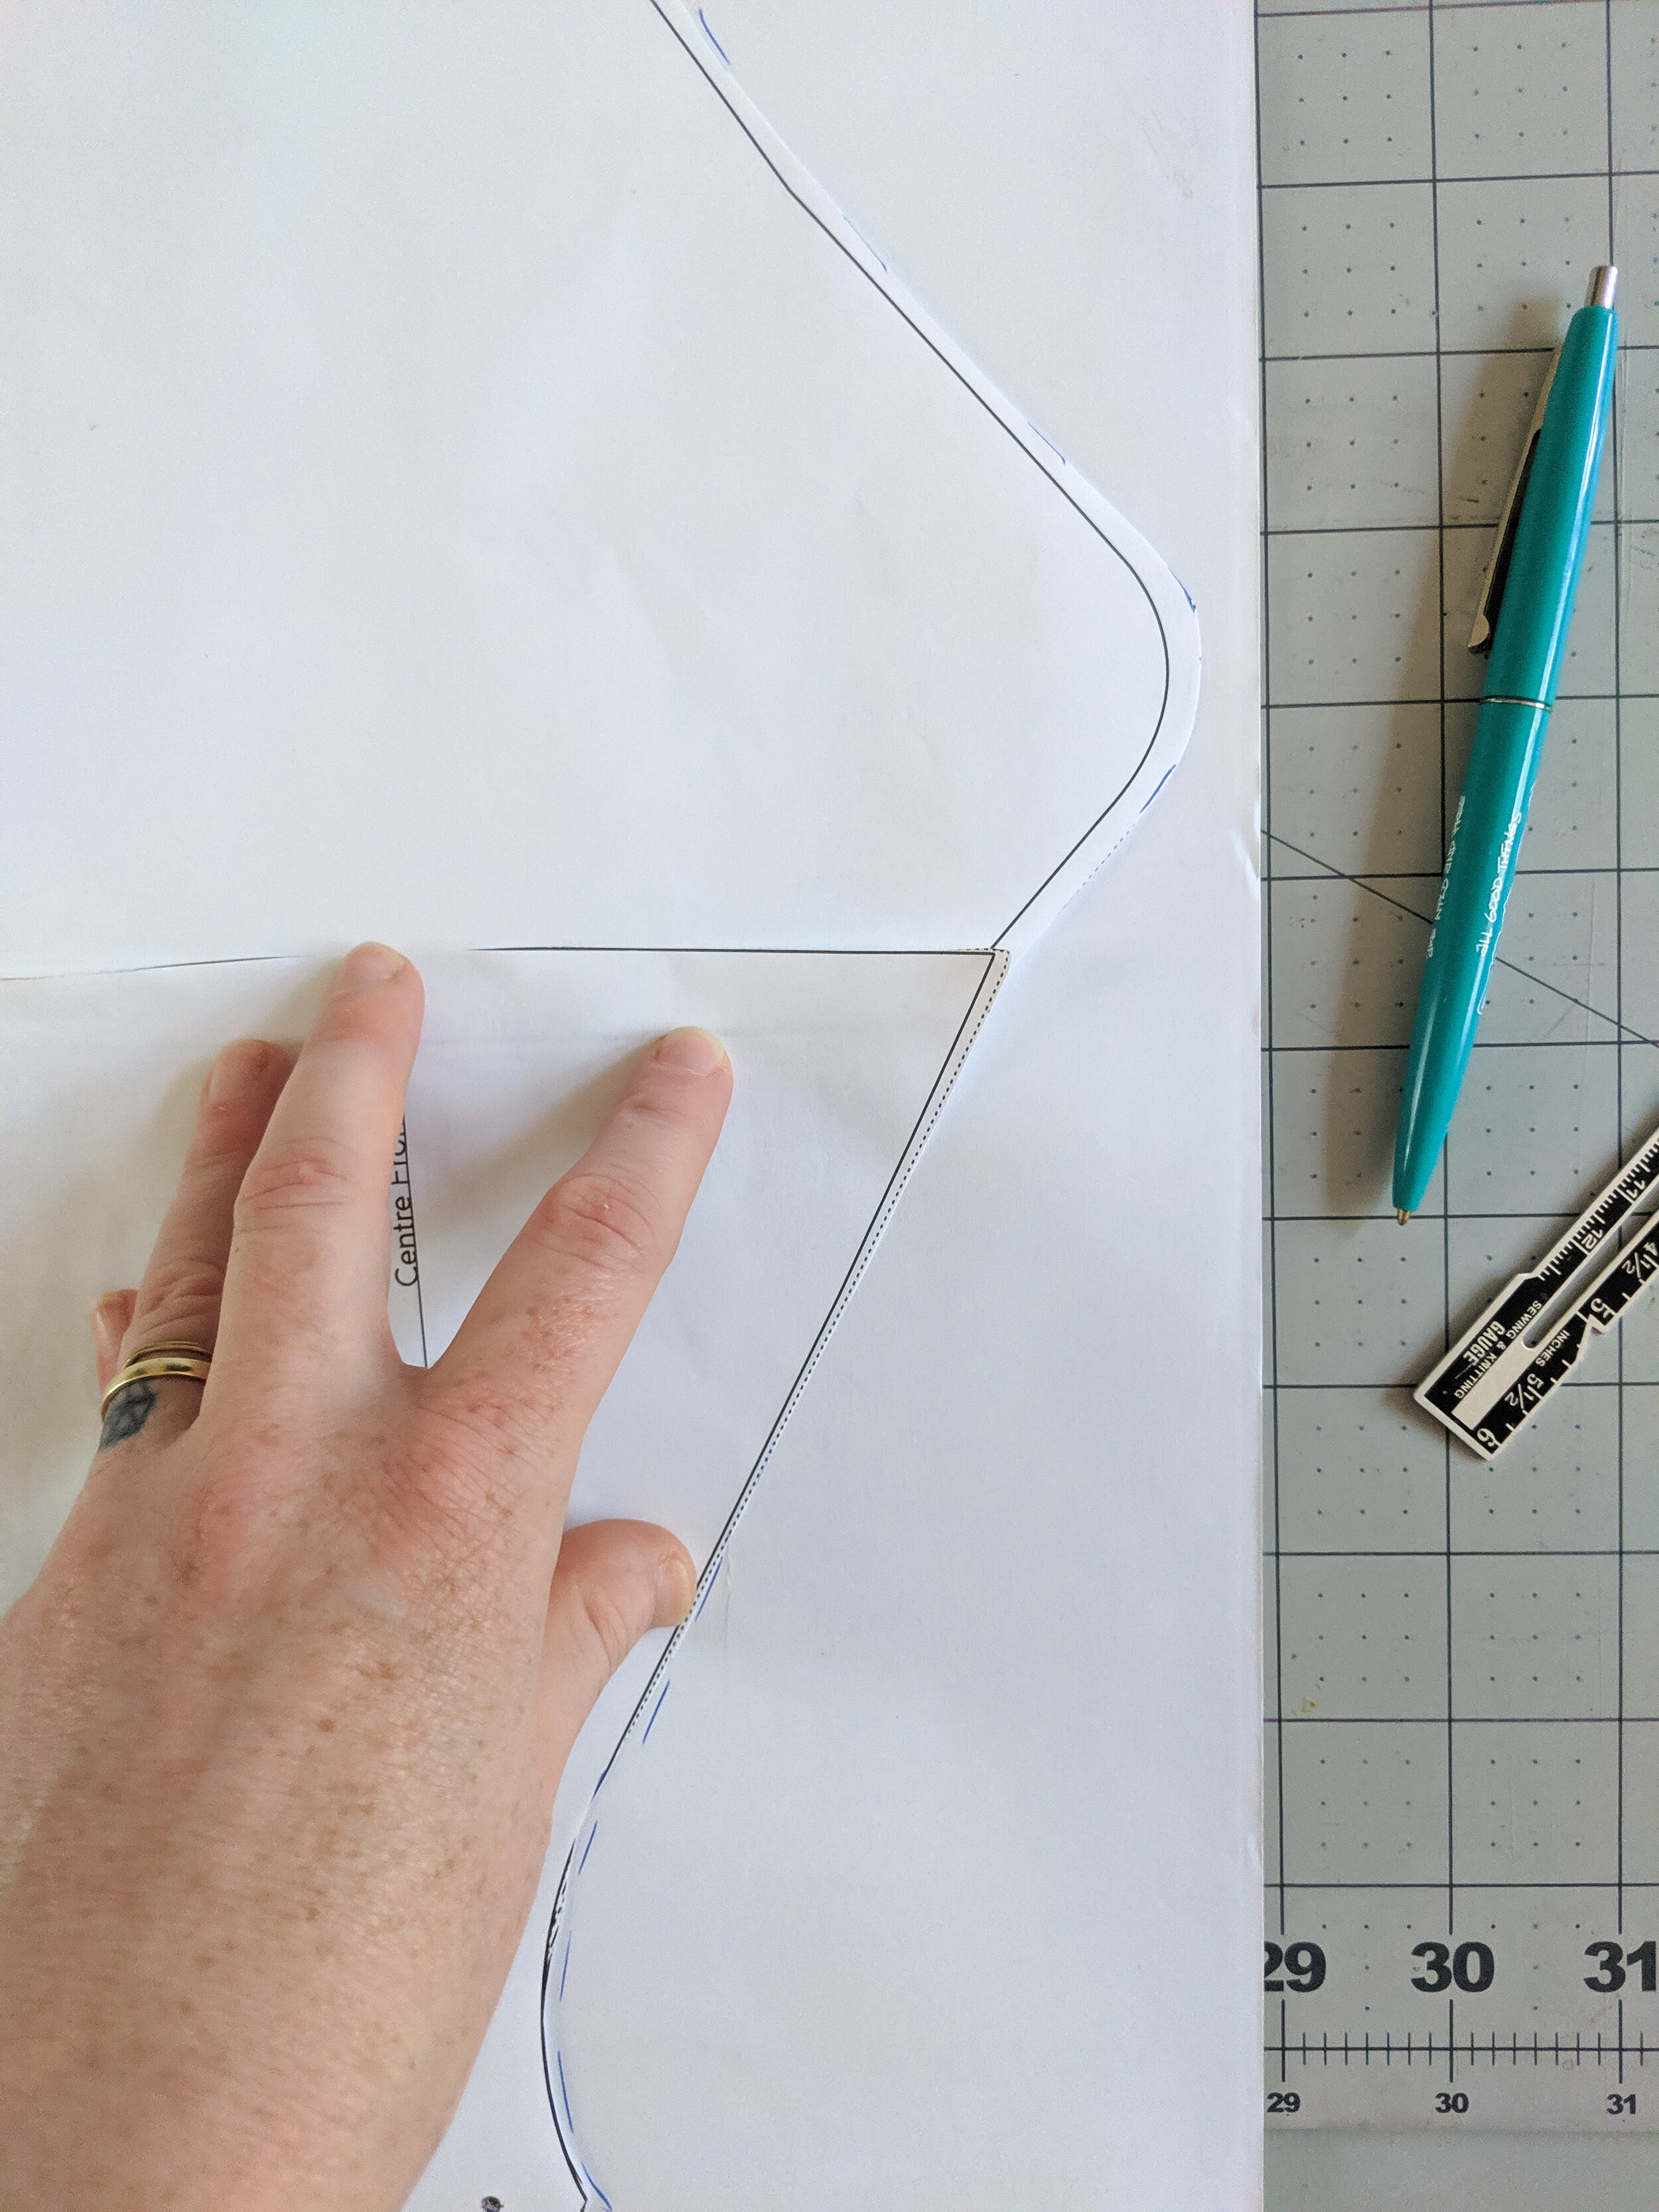
The Front Leg overlapping the Front Body pattern piece by 3/8 inch.
When the line of the joined Front Body and Leg have been traced onto your paper, it’s time to finish up the facing shape. Using a seam gauge, follow the line you traced of the pattern pieces and trace a parallel line at your desired width measurement. I wanted my facing to be around 2 inches wide, so I adjusted my seam gauge to about 2 ¼ inch and traced a line parallel to my traced line.

You can see I’ve got my squiggly noodle shape of the Front Facing. My original trace line is on the right and the parallel line I mimicked on the left using my seam gauge as a guide.
Once the facing shape is complete, cut it out and set aside.
Step 2: Trace the Back Body
With the Back Body laid out on your paper, trace the curve of the neck line only. This pattern piece is designed to be cut on the fold which means that we need to double the facing curve to ensure it covers the entirety of the back neckline. Flip the Back Body pattern piece over (so that it’s mirroring its original layout) and trace the curve of the neckline again making sure to overlap the Body Back onto the first traced Body Back line by ⅜ inch.
In the same way you finished the front facing piece, create your facing shape using a seam gauge at the same width measurement.
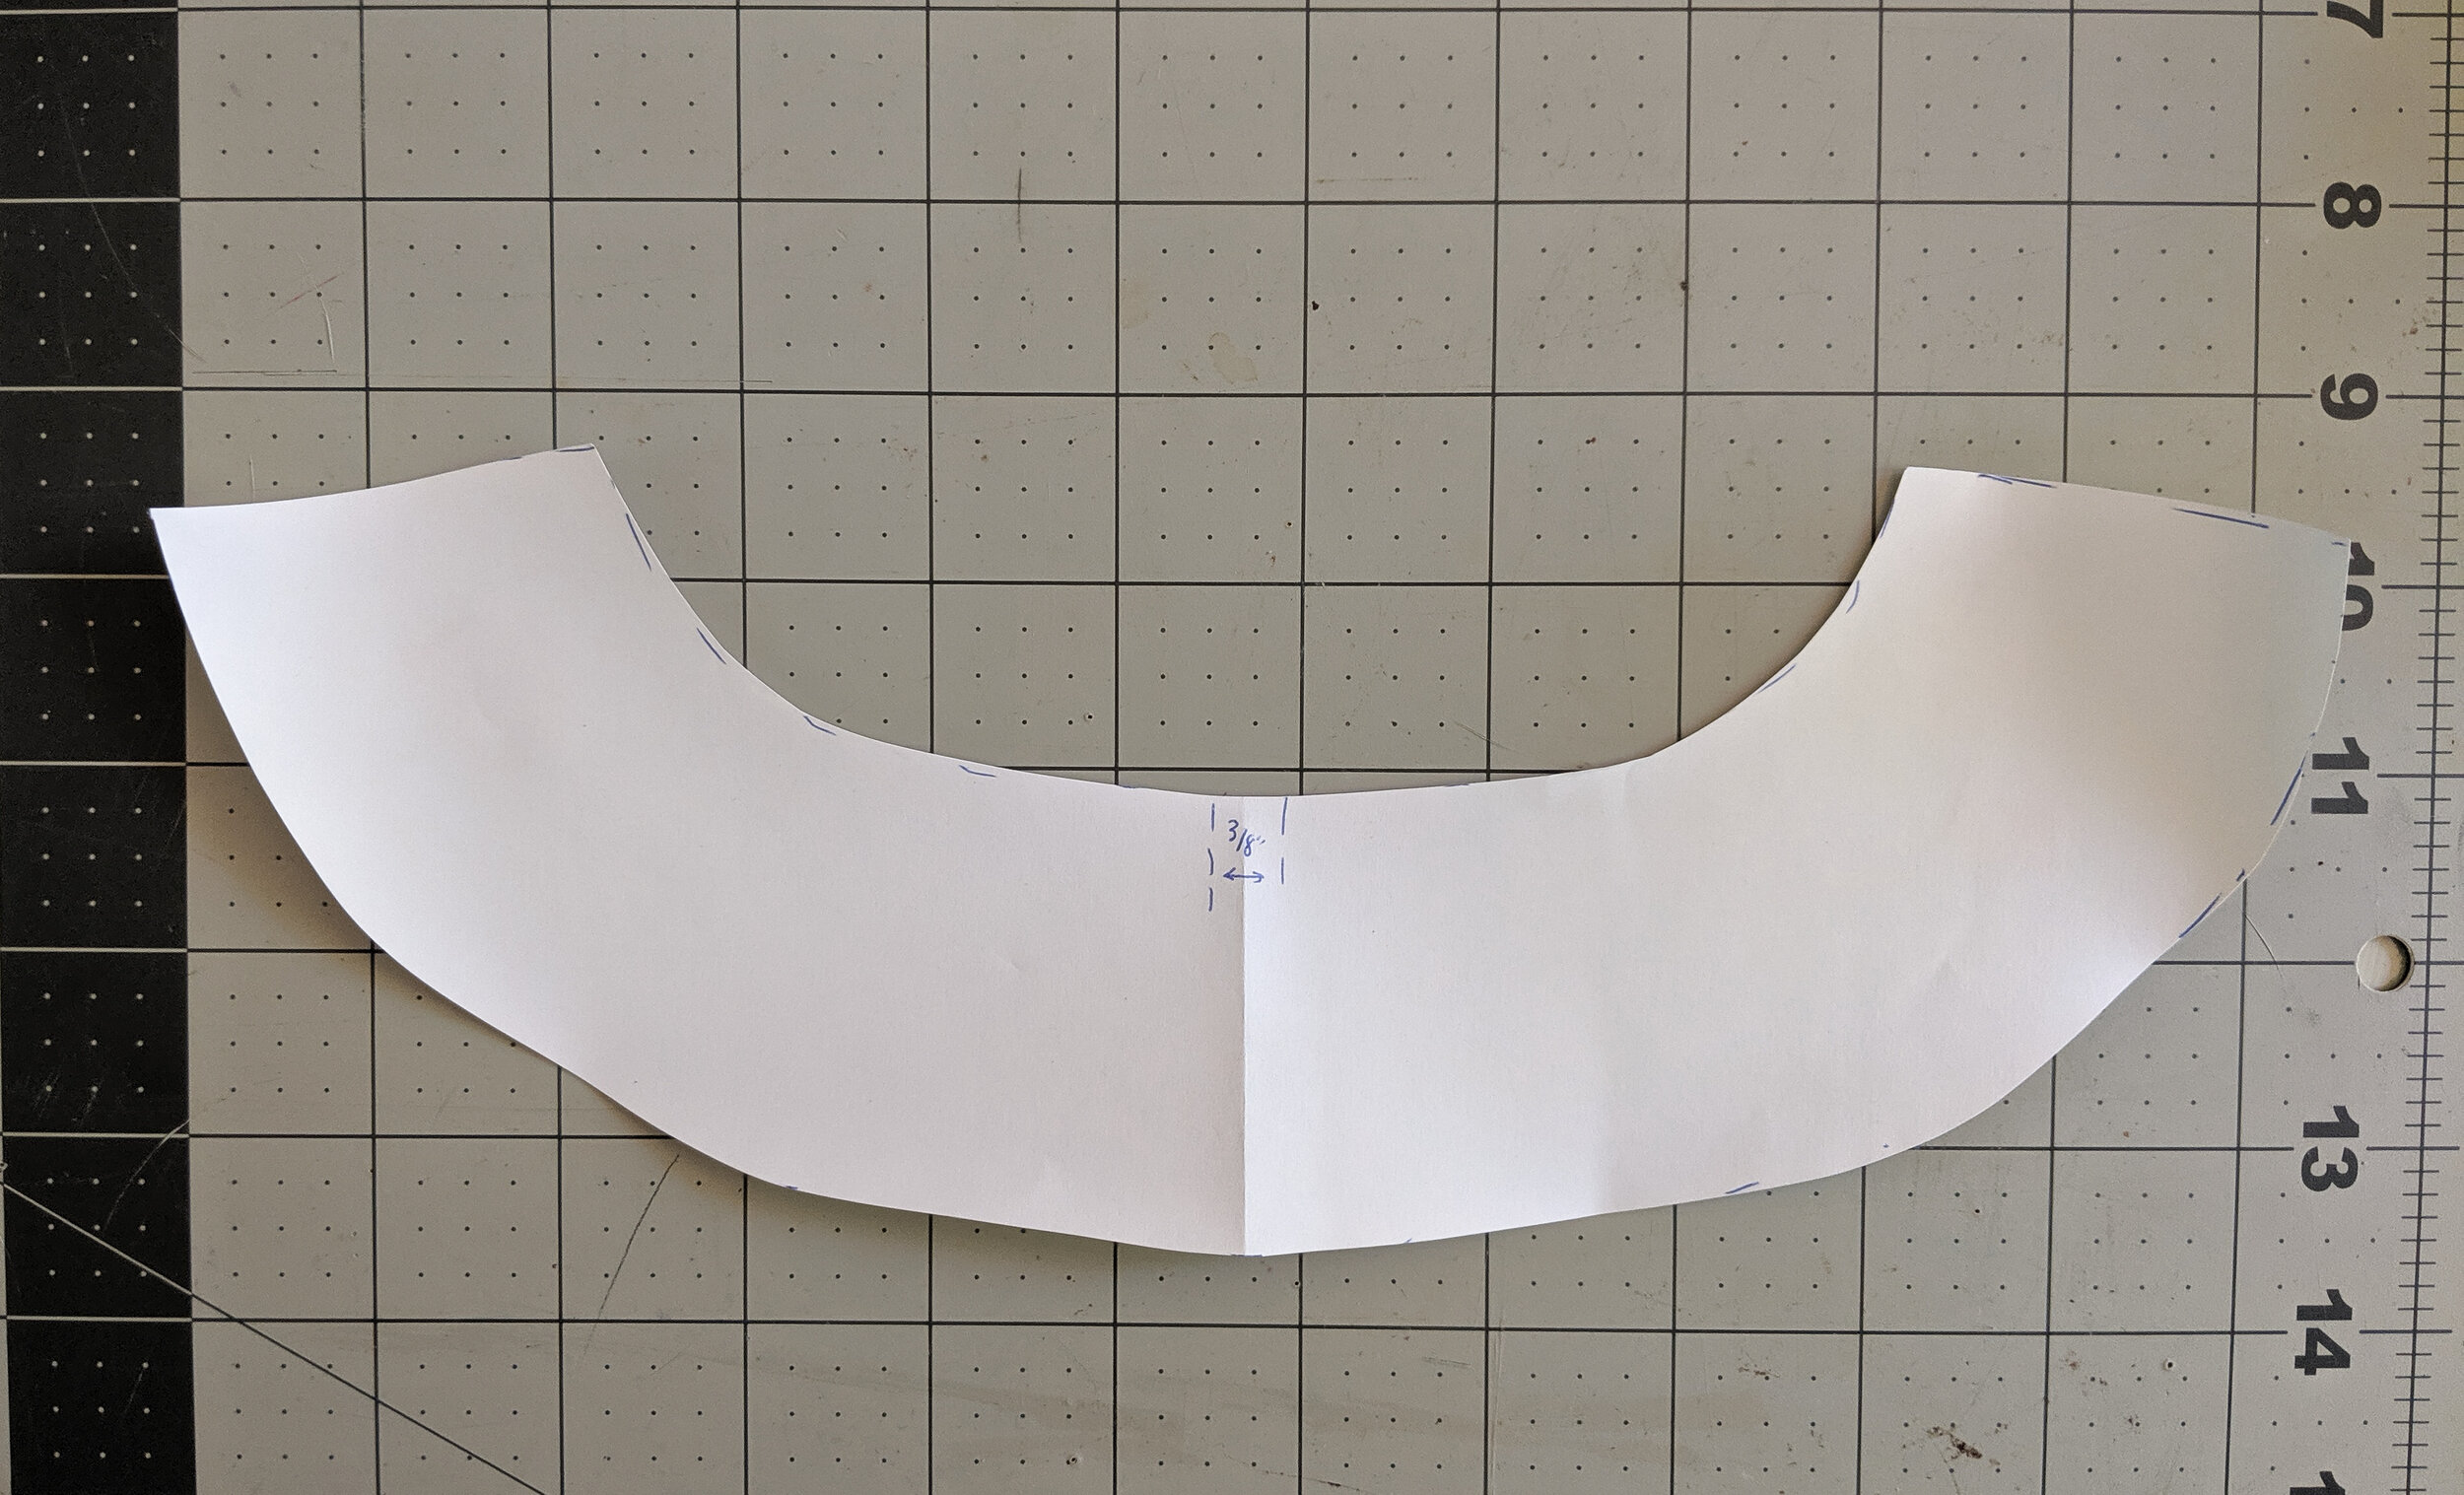
The Back Facing.
When the shape is complete, cut this one out too.
You should have two drafted pattern pieces! Remember, we’re making a u-shaped facing. Use these to cut out two Facing Fronts and one Facing Back. You will sew these three pieces together with the Facing Back at center and the Facing Fronts on either side.
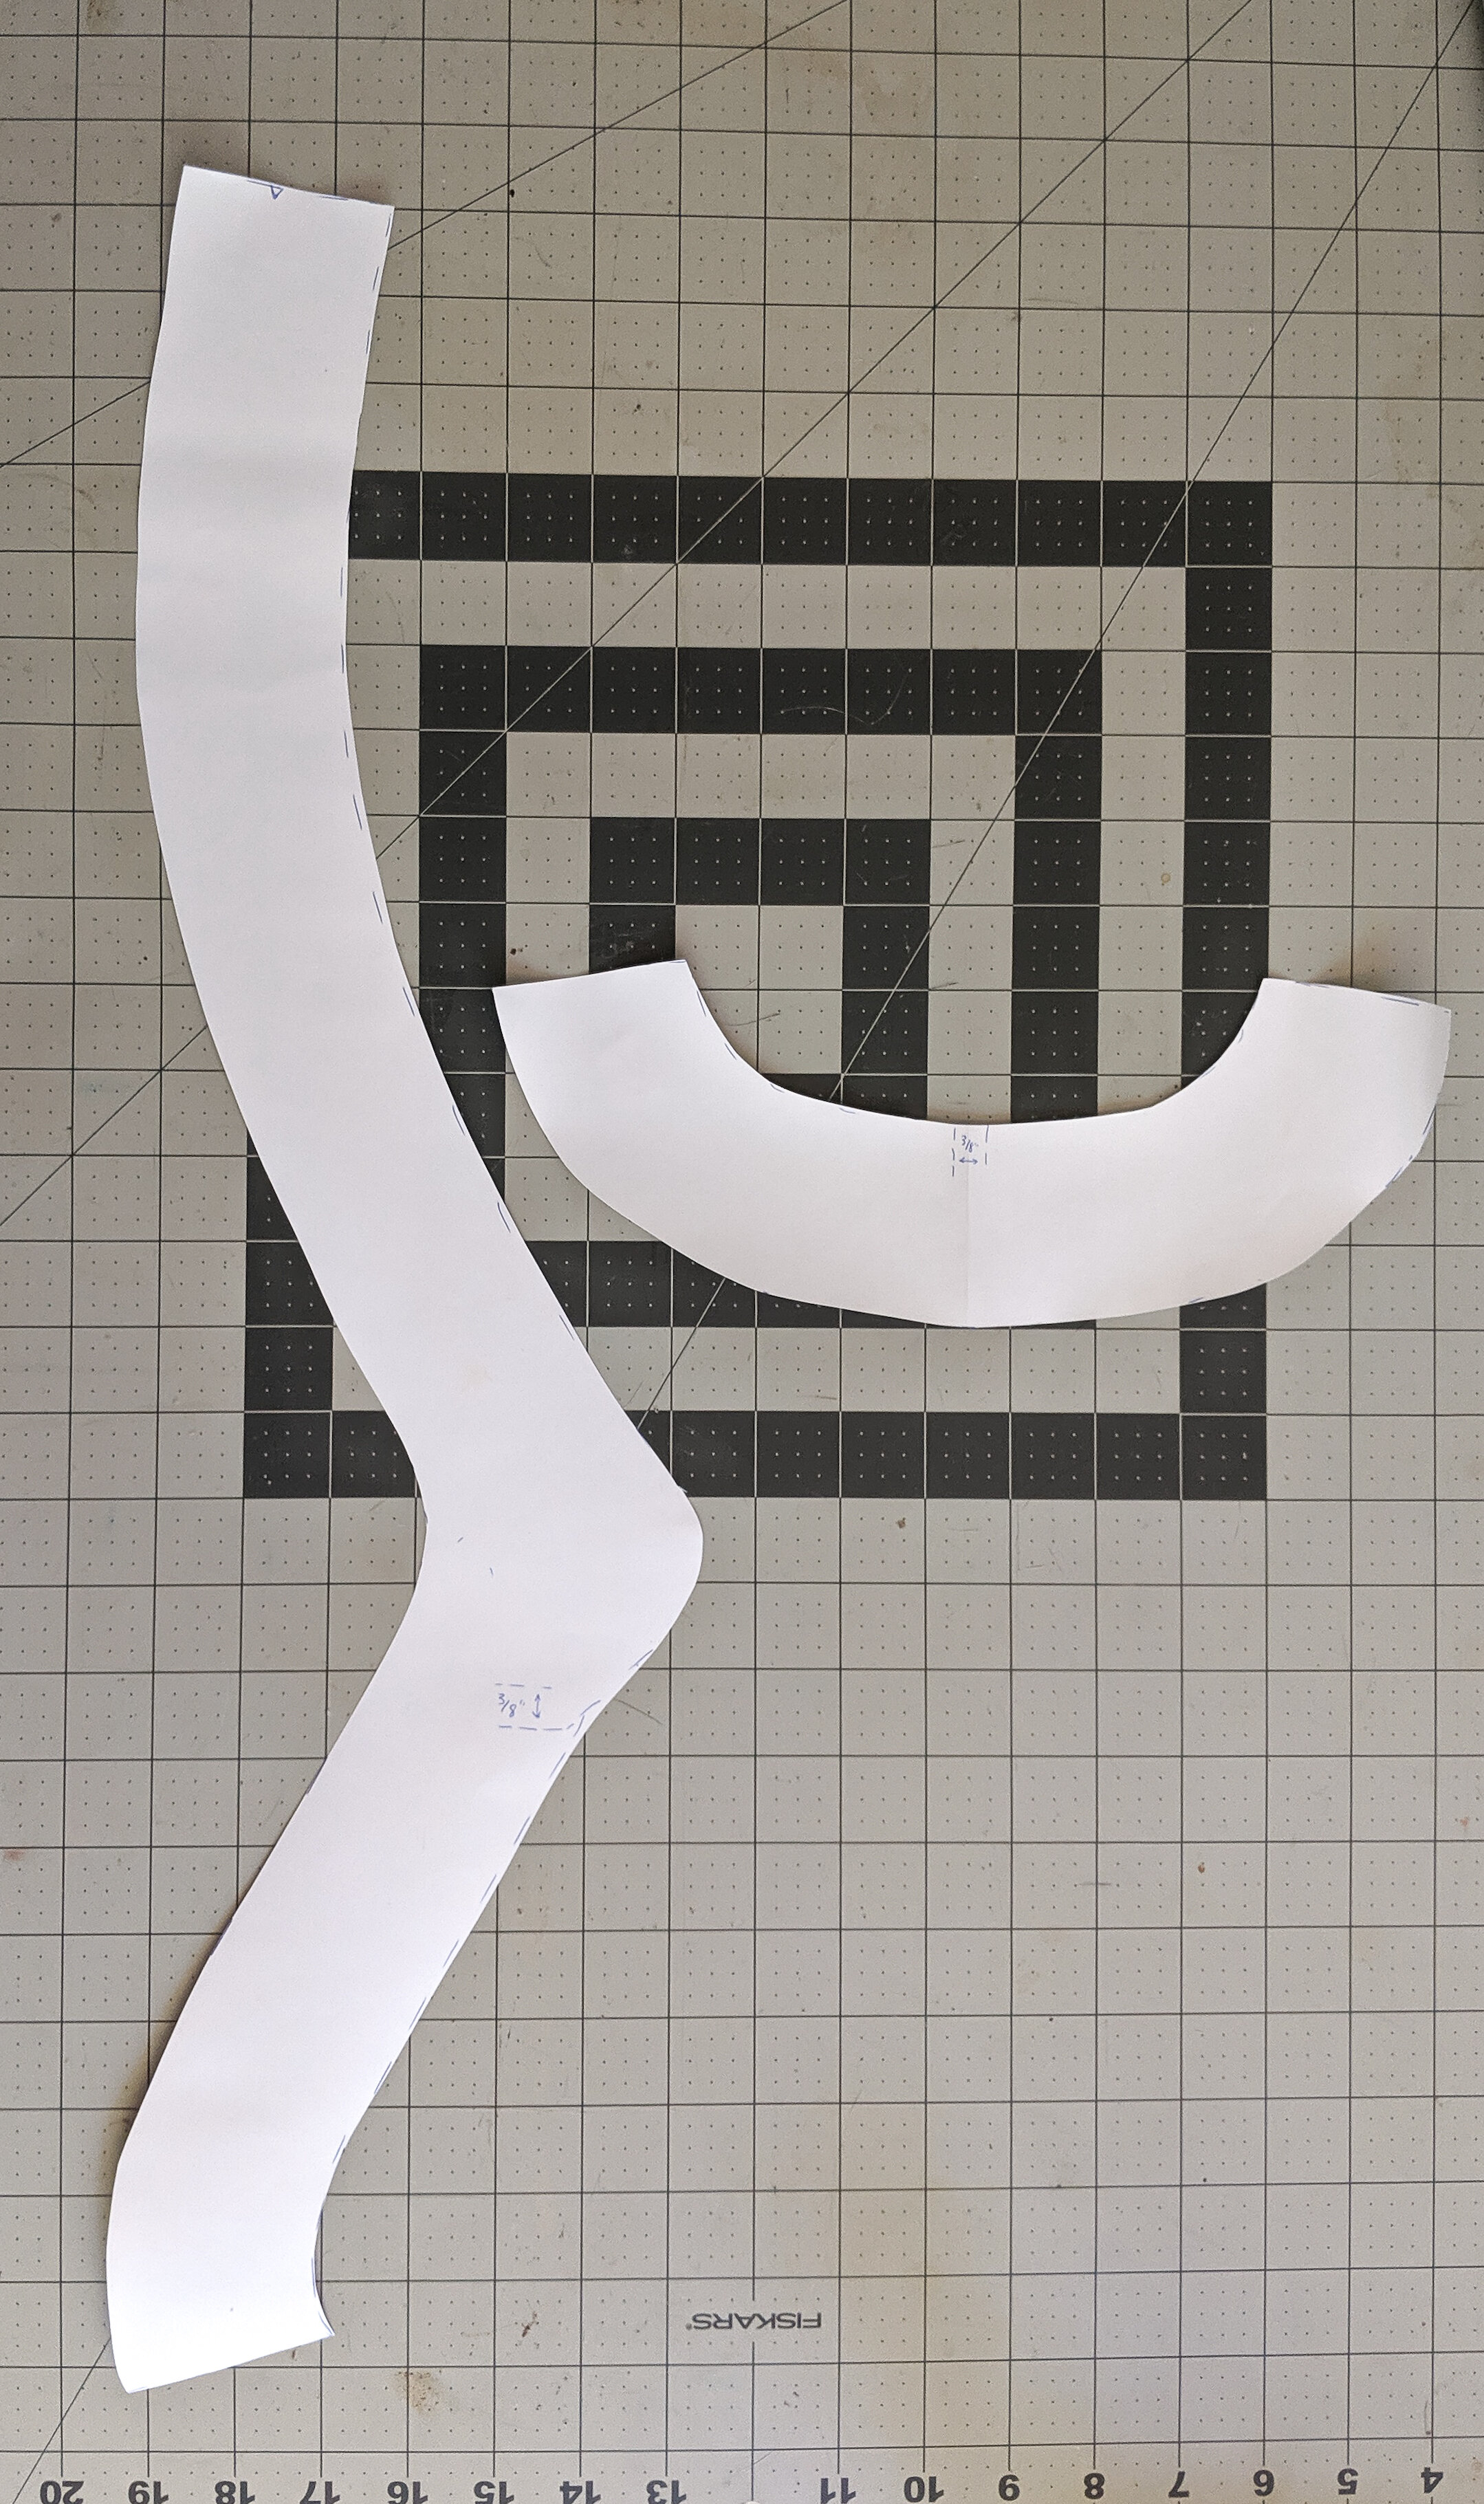
The newly drafted facing pattern pieces!
When the time comes, attach the facing like you would any other facing! Here’s how I did it:
Finish the short edges and inside edge of the facing with your technique of choice. I am a fan of a serged edge, so I serged the inside selvage and two short ends before attaching.
With right sides together, stitch the facing to the body with a ¼ inch seam, aligning the shoulder seams and curves on the front body. Make sure to organize your belt the way the Zadie instructions tell you to ensure it gets secured into the facing stitch line properly.
Understitch the facing. The curves can be a little tricky, but take your time. It is possible to understitch in the entire curve! Press the facing to the inside and topstitch the facing to the body.
Voila! Facing finish complete!

My finished facing— hubba hubba!